Creative Photography You Can Do At Home
Self-assignments of everyday subjects to spark your creativity
I spend close to 300 days a year on the road shooting assignments and teaching workshops in some of the most far flung locations you can imagine. I love to travel, and photographing new cultures and environments gets my creative juices flowing. Sights, smells, colors, and sublime light jumpstart my passion for image making.
But what ideas and subjects could you photograph at home to improve your photography?
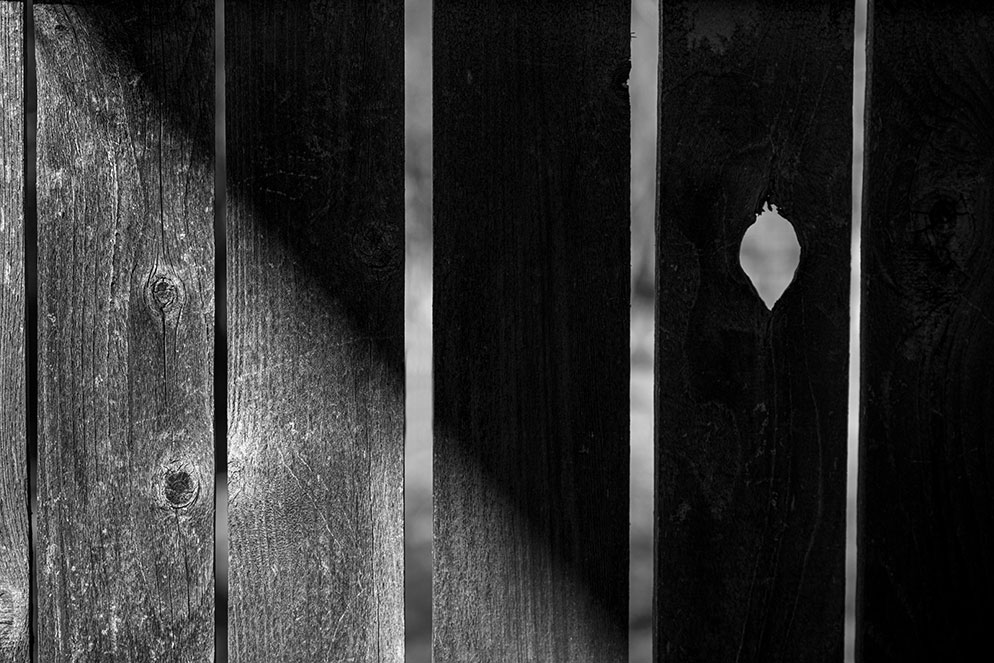
B&W often turns noisy or cluttered scenes into images that become all about light and shadow, and patterns. Sunlight hitting part of the fence makes it more interesting than if the entire fence was in the sun. Always look for the interplay of light and shadow.

Its easy to overlook something like a dog's footprint in the frost but when you zoom in tight, the image becomes much more impactful. The image becomes one of color and texture and shapes.
Since my creative awakening at home, I’ve found countless subjects to photograph. Each morning looks different in my backyard. I see shadows on the wall I never noticed before. Buzzing insects get my attention as new subjects.
Take the home photography challenge. You might be surprised what you discover what’s been in front of you all along.
Chase the shadows. Have you ever noticed how many shadows are in your house or right outside your front door? I hadn’t until I really started looking for them. Window light creates endless patterns on the walls and floor. As the sun moves across the sky during the day, the shadows will transform on different surfaces. When the sun sets, use room lights to create shadows. I like to convert shadow images into B&W. Eliminating color accentuates graphic shapes and patterns.
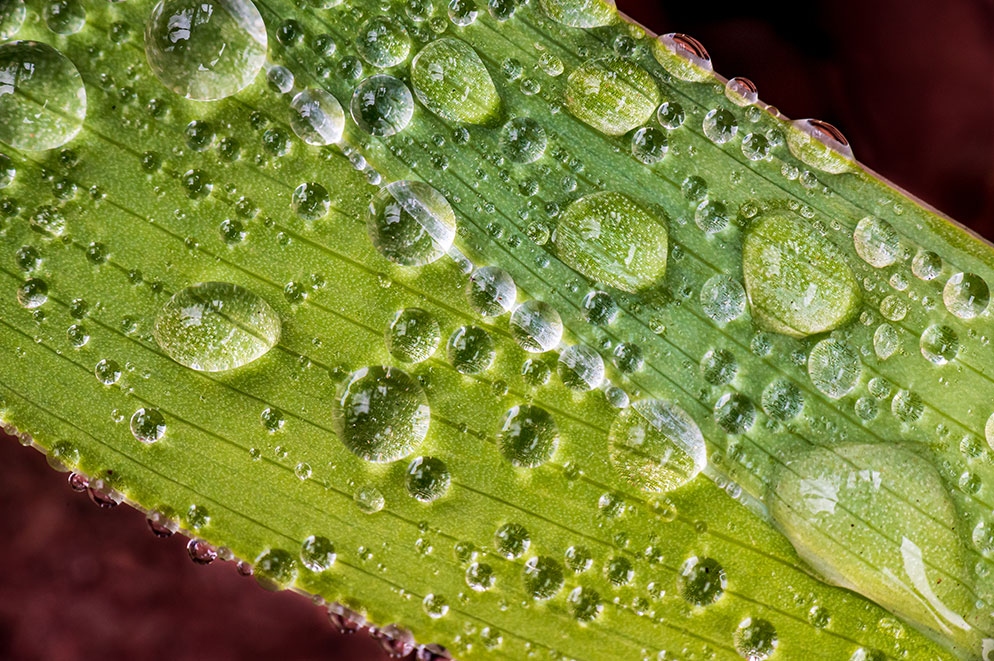
A close up or macro photo of a subject will often be more interesting than a photograph of the entire object. Here's a tip: there's no need to get up early in the morning to photograph the dew on plants and flowers. A simple spray bottle can "make it rain".
Macro photography requires slowing down, and really scrutinizing the small scene. Normal compositional guidelines apply, you just have to work with tiny details. A small pine needle can create a beautiful image. Try focusing on what is around you. Take your time to really ‘see’ the small details.
Proper gear is important. For macro photography, a macro lens is really handy. My favorite macro lens is the Nikon 105mm Micro-NIKKOR. This lens allows me to get life size reproduction of the subject in the frame, and the narrow angle of view helps keep compositions clean and simple. I normally use a cable release to prevent any camera movement during the exposure. If you don’t have a cable release, try using the self-timer for a delay of five seconds. You can use a tripod if you feel you need it, but you can also make great macro images hand-held. Just make sure you set a fast shutter speed like 1/500 second.
Depth of field is critical with macro photography. For maximum depth of field, make sure the front of your lens is parallel to your subject. Try an aperture setting of f/16 and review the image on your LCD for sharpness. Flat subjects should be sharp. But images with a lot of depth may require special techniques like focus stacking. Here's an article on creatively focus stacking flowers.

The flower stands out for a couple of reasons. One, because its the sole subject of the image on a black background and two because of the negative space surrounding it. Don't always feel that you must crop in tight on a subject. Sometimes an image works just as well with the subject showcased in this manner.
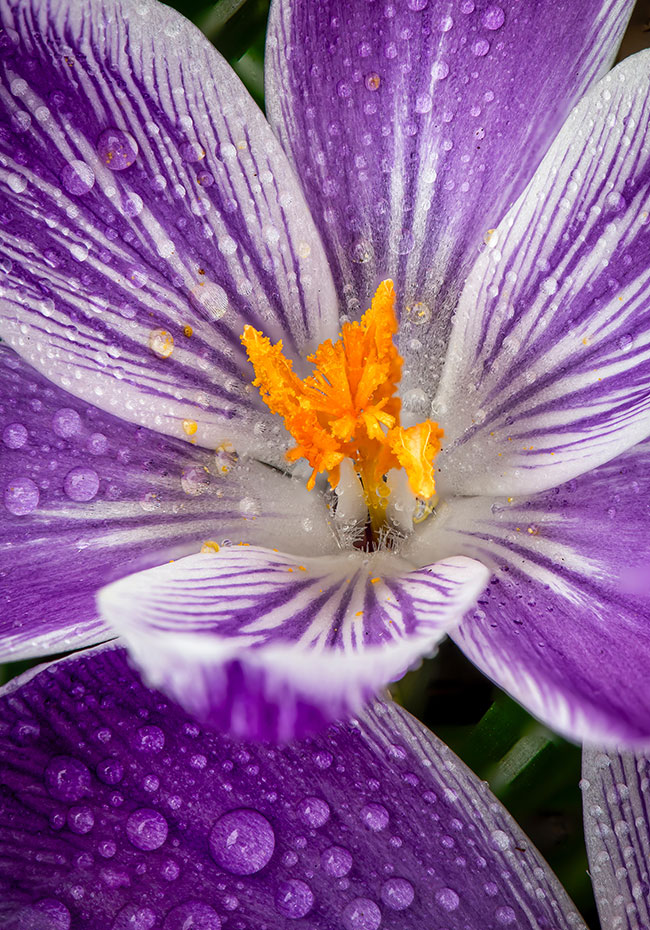
Look for colors that complement each other. This can be in how you compose an image or how you might find a subject in nature like this flower. The orange parts of the flower pop dramatically against he purple and white, making for a vibrant image. THe addition of water droplets gives it added interest.
Water droplets are a great macro subject. And you don’t have to wait for it to rain. I use a plant spray bottle. This spray bottle produces tiny water droplets that look great on plants and add circular reflective shapes to my images.
Embrace the season. It is spring in Colorado right now, which brings a variety of weather. Today it is sunny in my yard. I’ve been out photographing spring flowers, early morning frost on leaves and graphic shadows on our house. Tomorrow we are under a winter storm warning, and six inches of snow is expected. I will have a completely different environment to photograph tomorrow.
Whatever the season is, celebrate it. What images can you create that really exemplify the season? Is it cold or hot? What photographs best illustrate temperature? In spring, I try to capture concepts such as spring growth, renewal and new beginnings. At the same time, I’m photographing powerful graphic images that stand alone.
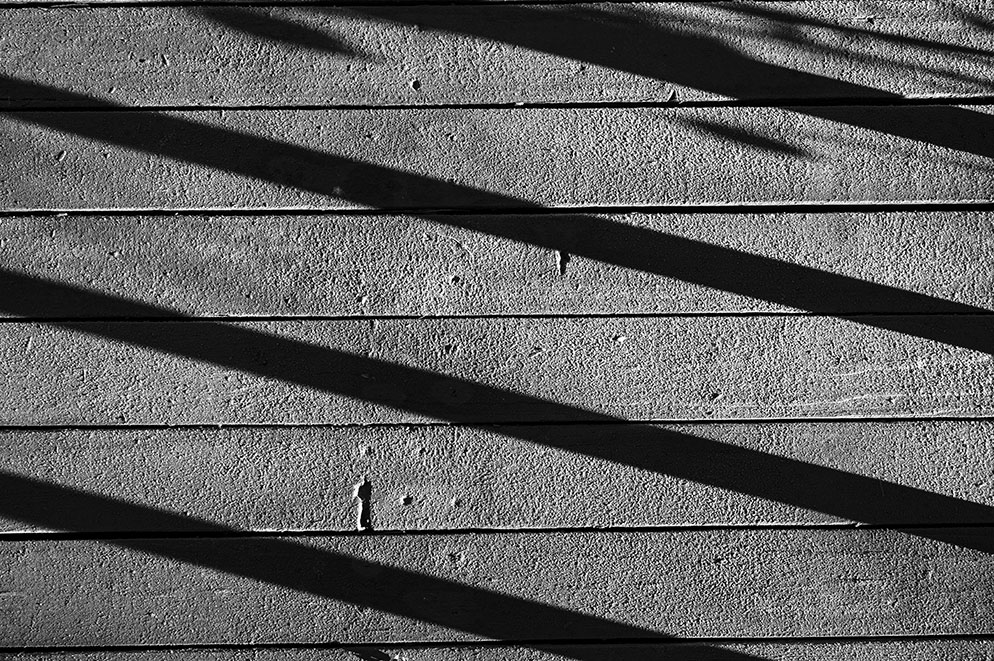
Look for lines and patterns like this image of a wood deck. You can convert to B&W using the monochrome Picture Control in the camera or convert it afterwards on the computer.
Set up your home studio. Many of my assignments take place outdoors. While I love shooting outside, many times the weather gets nasty, my gear gets trashed and I don’t get the image I had envisioned. On days like these I envy studio photographers who can control their photographic conditions. Photographing at home offers every photographer this option. Try building your own home studio.
I like to set up a small studio in my garage, but any indoor space will do. I’ve even used the kitchen table with some props and Speedlights to create images. Subject matter can range from small still life shots to portraits of family members. Create an interesting background that will complement your subject.

Zooming in or getting close to your subject can also mean photographing a bunch of "something" too. This image is a great example of a monochrome pattern—the plants are far enough from the camera so you can see a lot of them, but the composition is such that the image is all of the same type of plant.
Lightpaint your world. I always bring a small pen flashlight with me on trips. With extra time on my hands at night, I lightpaint objects in my hotel room. Really, it’s fun, and the images are great. You can easily lightpaint at home. All you need is a small flashlight, a tripod and a dark room. Small objects on a table work great. Everything from decorative ashtrays to flowers will work well. I like outdoor activities, so I often light paint fishing and climbing gear.
Lightpainting technique is fairly simple. First, set up your camera on a tripod. Next, focus on your subject in the light. You can use either autofocus or manual focus, but after you’ve focused on your subject, switch to manual focus. You don’t want your camera searching for focus in pitch black conditions. Using Manual mode, set your shutter speed to 30 seconds, aperture to f/8 and ISO 1000. I normally leave my white balance on Auto. I use a cable release to trigger the shutter to eliminate any vibration. You can use a wired or wireless remote if you have one. Once you open the shutter, turn on your flashlight and pulse light across different areas in scene. Small focused flash bursts will give you more control. The trick to good light painting is not illuminating the entire scene. What is lit is just as important as what is dark. Just pulse small bursts of light onto specific areas in the shot. Experiment, review images on you LCD, and keep photographing. Adjust your settings as needed for a correct exposure.
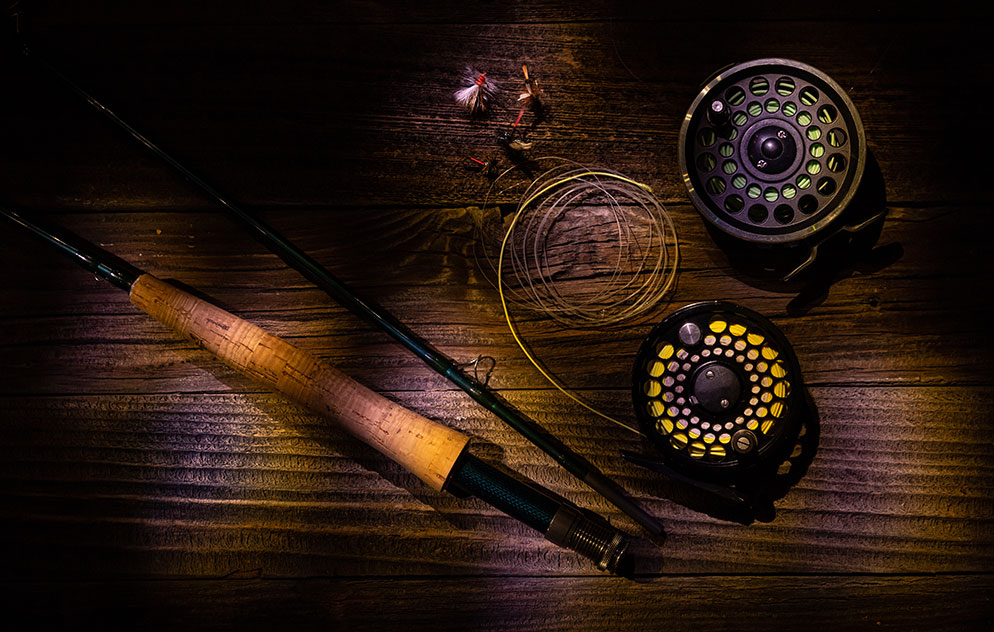
Fly fishing gear, always a favorite subject of photographers who enjoy lightpainting. Depending upon the type and color of the lights yuo use, your images may take on a warmer tone, like in this photo, or a cooler tone.

Lightpainting is one technique for selectivley lighting an object or scene. In this image, climbing gear has been placed on a dark background. By selectvely choosing where in the image to illuminate, the areas of shadow become just as important to the final image.
Learn online. After you’ve exhausted all your ideas for shooting at home, find inspiration here at Nikon Learn and Explore. There are numerous articles and videos on a wide variety of topics. New cameras are discussed, and techniques range from simple creative ideas to advanced flash and video production. Read the articles and view the videos on your phone, tablet or computer.
Once you begin to realize all the home photography possibilities, you can stay busy for days with self-assignments. You don’t have to travel to the far ends of the planet to create beautiful images. Who says you can’t create great images at home?